Students build and print objects while developing proportional reasoning and technology skills
Each year we explore new and innovative ways to teach middle grades students the foundational concepts and skills they need for algebra such as proportional reasoning. This year, we engaged students in a scale modeling project using 3D technology. Throughout the project, students had complete autonomy, engaged meaningfully in proportional reasoning, and took home something tangible to represent their work.
Getting Started
In our scale modeling project, students were tasked with creating a scaled version (i.e., stretch or shrink) of a real-world object. Students had complete freedom to choose their object and were only given the requirement that the object must come from the real world. They could choose real-world objects such as famous building structures, animals, sporting equipment, automobiles, and much more.
Before diving into the task, students became familiar with the 3D design platform Tinkercad by creating a free online Tinkercad account (www.tinkercad.com) and completing tutorials to learn the basics of the program. Some students were already familiar and had accounts of their own. Other students were not as familiar, but quickly became comfortable with this technology. After learning the basics of Tinkercad, students were ready to dive into the project!
Choosing an Object and Finding the Actual Dimensions
After learning how to use Tinkercad, students chose a real-world object to scale. They selected a variety of different objects such as a book, a car, a wooden raft, electronics, sporting equipment, and a pair of shoes. However, a few students struggled with the idea that their object had to be “real-world.”

Figure 1
For example, one student originally chose a picture on the Internet that incorporated music, one of her passions. After having a discussion about scaling and what is considered a real-world object, she readjusted her thoughts and chose a book in the classroom as her object, using a ruler to determine its dimensions (see Figure 1).
Some students were able to physically measure the dimensions of their object while others had to research the dimensions online. For example, one student chose his favorite car, a Nissan Skyline GT-R, as his real-world object and used the Internet to research the dimensions of the car. Another student chose a log raft. When searching online for the dimensions of the log raft, he could only find dimensions for inflatable log rafts. After several minutes he tried a new strategy by searching with the phrase “how to build a log raft,” which took him to a wiki page that showed him step-by-step how to build a log raft and included the dimensions of each component.
Scaling the Object – Fitting the Printing Plate
All students were given the same criteria and constraints for scaling their object. Essentially, the scaled version of their object had to fit on the printing plate of the 3D printer. This meant that the object would need to print with a maximum length less than seven inches, a maximum width less than 5 inches, and a maximum height less than 6 inches. Because every student identified a unique object to scale, each student had to determine their own scale factor (as long as it fit within those dimensions). Because of the uniqueness of each student’s project, there were multiple possible solution paths and strategies for determining the scale factor.
The student who chose the Nissan Skyline GT-R knew he had to greatly scale down his object, but was unsure about how to go about it. We engaged him in meaningful discourse about scale factor. During this conversation he mentioned that half the size of the car would still be too big to print. He determined this by using his calculator and multipling each dimiension by 1/2 in order to show the dimensions of half the size of the car. This allowed us to assess his understanding of scale factor, where we noticed that although he was able to procedurally calculate scale factor, he struggled to understand what it represented.
We encouraged him to think of another scale factor of the Nissan Skyline GT-R dimensions that might be small enough to fit the printing plate. He then tested a scale factor of 1/12 but discovered the scaled model would still be too big to fit the printing plate. To work more efficiently, the student decided to only multiply the length by different potential scale factors as a first step because it was the largest of the dimensions.

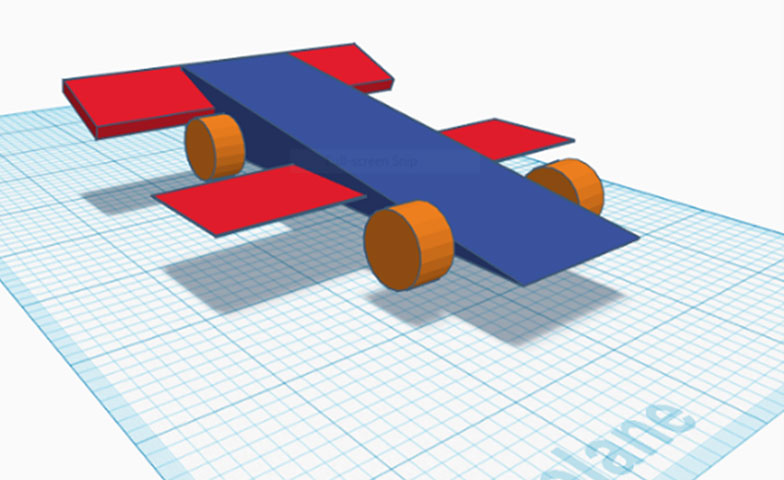
Figure 2
For his next attempt, he chose a much smaller scale factor of 1/45, which he found fit well within the constraints of the printing plate, and he opted to find a larger scale that still worked (he wanted to create the largest model car he could). This student eventually settled on 1/26 as his scale factor and used it to find the dimensions of each part of his scaled car as shown in Figure 2.
Building and Printing the Object
After appropriately scaling their objects to fit the printing plate on the 3D printer, students were excited and ready to build their scaled objects in Tinkercad. Students approached the design process in different ways. The student scaling the book started by creating a rectangular prism. She placed the rectangular prism on the grid and changed the size of it to match the dimensions of her scaled book. She then created the spine of the book using the “hole” feature and personalized the cover of her book using the same feature. Finally she added a piece to the top to create a chain and it was ready to be printed! See Figure 3 for her finished product.

Figure 3
The student who created the model Nissan Skyline GT-R started by building the wheel base of his car. He continued adding pieces to the grid, all while using the correct dimensions, to make his object look more like a car (see Figure 4). In the end, although his car did not look exactly like his favorite car, he was extremely proud of the time and effort he put into creating his scaled model. The true excitement of the project came from the building and printing of the objects. Students greatly enjoyed seeing their scaled object printed as well as those of their classmates.
Conclusion
For this scale modeling project, students chose an object, found its actual dimensions, and used scale factors to determine appropriate dimensions for scaling the object that met the space constraints of the printing plate. Students were able to use their scaled dimensions to recreate their object using the Tinkercad 3D design software.
This project provided students with the opportunity to build, personalize, and print their object, allowing for an engaging student-centered experience while also developing students’ 21st century technology skills. The project also gave students the opportunity to recognize the multiplicative relationship with scaling (stretching and shrinking), further preparing them for the algebra learning they would soon experience in high school.
Students finished the project with their own scaled 3D printed object and a more concrete understanding of scaling and proportional reasoning because they physically experienced the scaling process!
Standards Addressed
Our scale modeling project addressed key mathematics content and practice standards (as in CCSSM; CCSSI 2010) for the middle grades. This project aligns to the ratios and proportions domain (6.RP.3 and 7.RP.2), the expressions and equations domain (6.EE.9), and the geometry domain (7.G.1 and 8.G.4). The project also addresses Standard for Mathematical Practice 6, Attend to Precision and Practice 8, Look for and Express Regularity in Repeated Reasoning.
Common Core State Standards Initiative (CCSSI). 2010. Common Core State Standards for Mathematics. Washington, DC: National Governors Association Center for Best Practices and the Council of Chief State School Officers. http://www.corestandards.org.